5. Receiving and Managing Bookings
Once your campsite is live with open availability, campers can submit bookings. This guide covers how to view, respond to, and manage those bookings.
Step 1: View incoming bookings
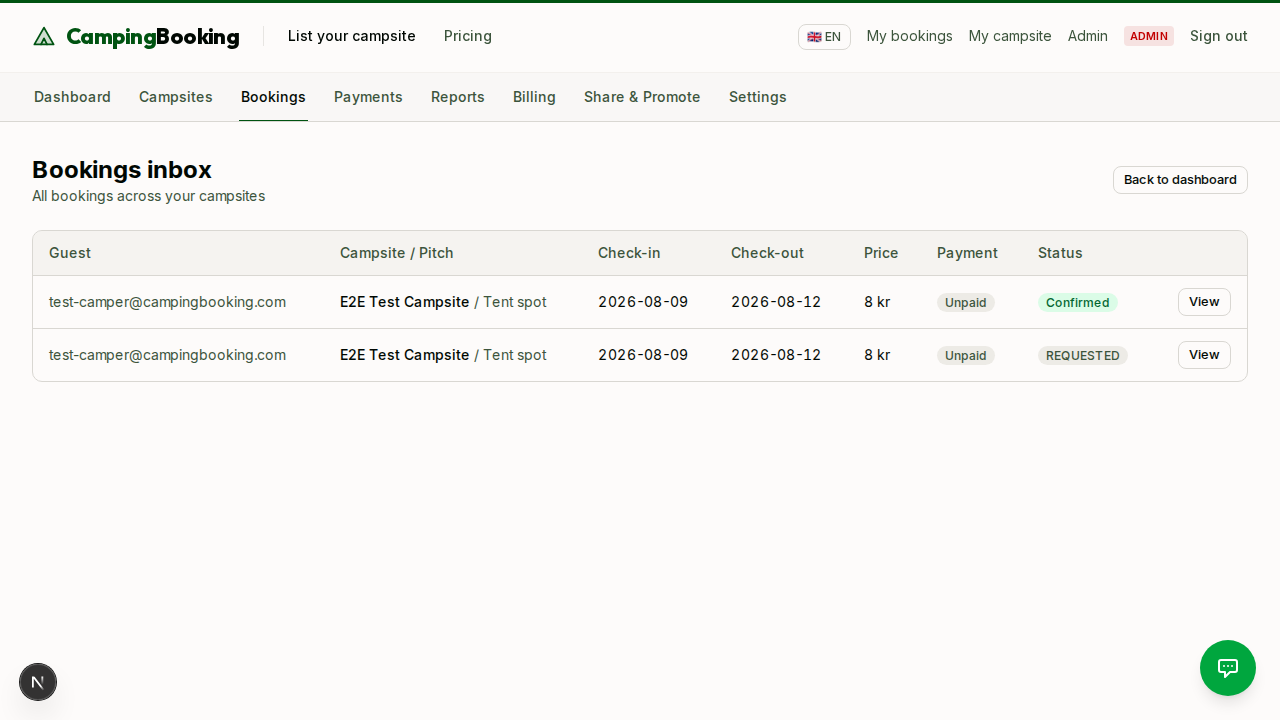
From your owner dashboard, go to Bookings to see a list of all bookings for your campsites — upcoming, pending, and past.
Step 2: Respond to a booking request
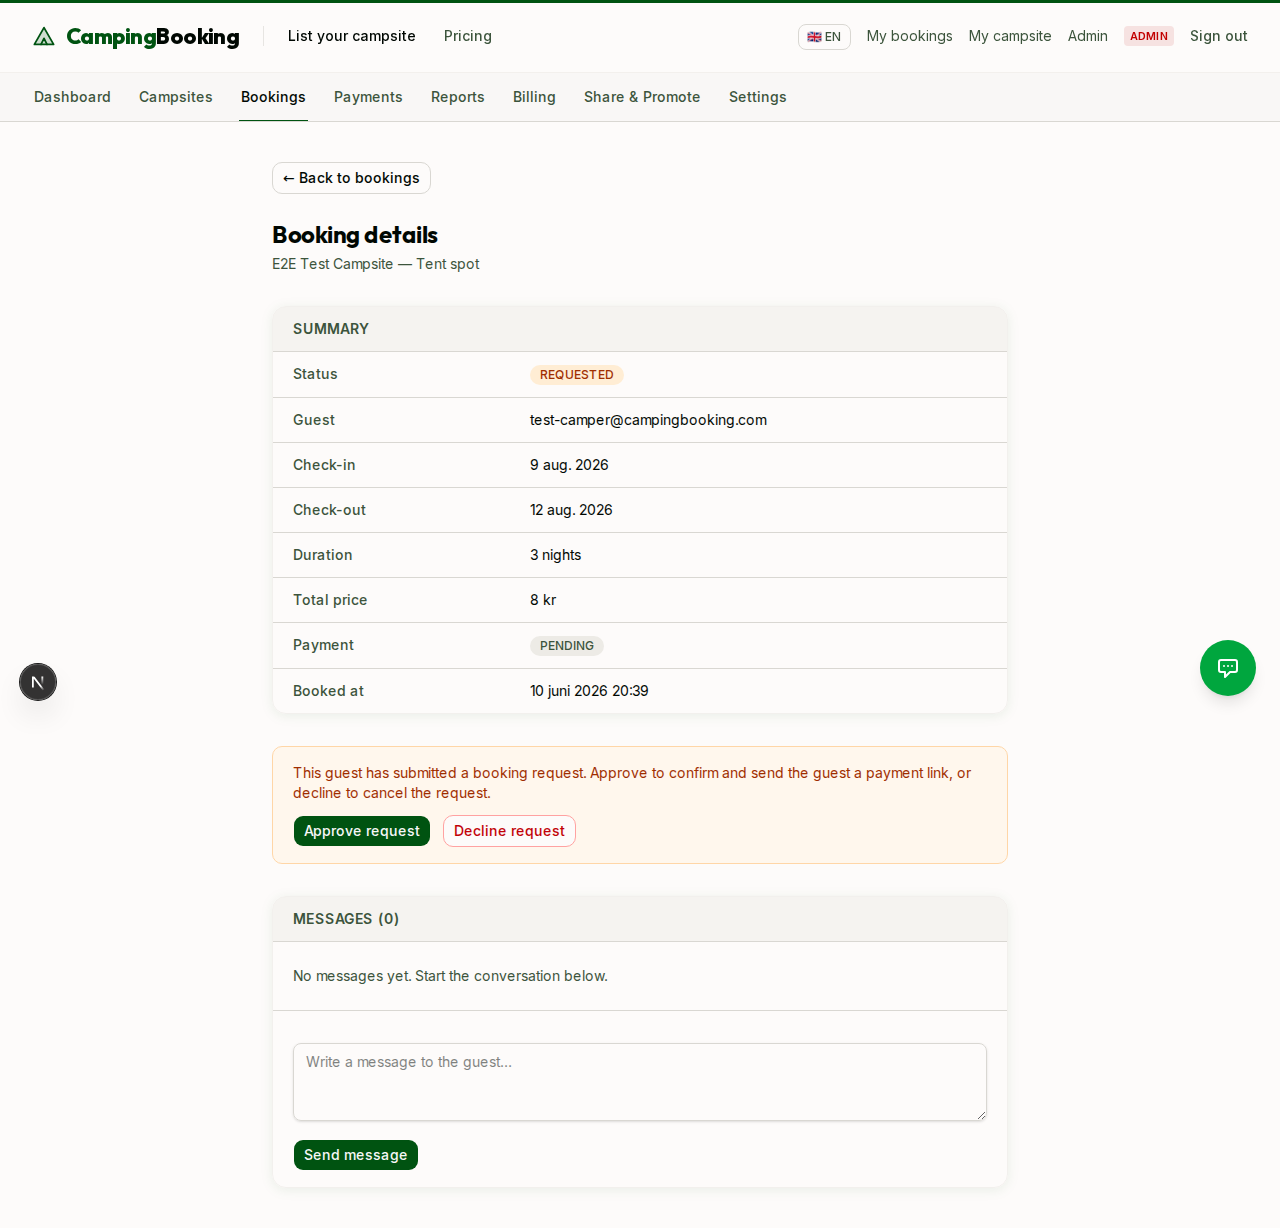
Open a booking to see its details: pitch, dates, guest count, and any message from the camper. Depending on your campsite's settings, bookings may require your approval before they're confirmed (request-to-book), or they may be confirmed automatically.
For bookings that need approval:
- Click Approve to confirm the booking. The camper is notified and payment is captured.
- Click Decline to reject the request. The camper is notified and is not charged.
Step 3: Message the camper
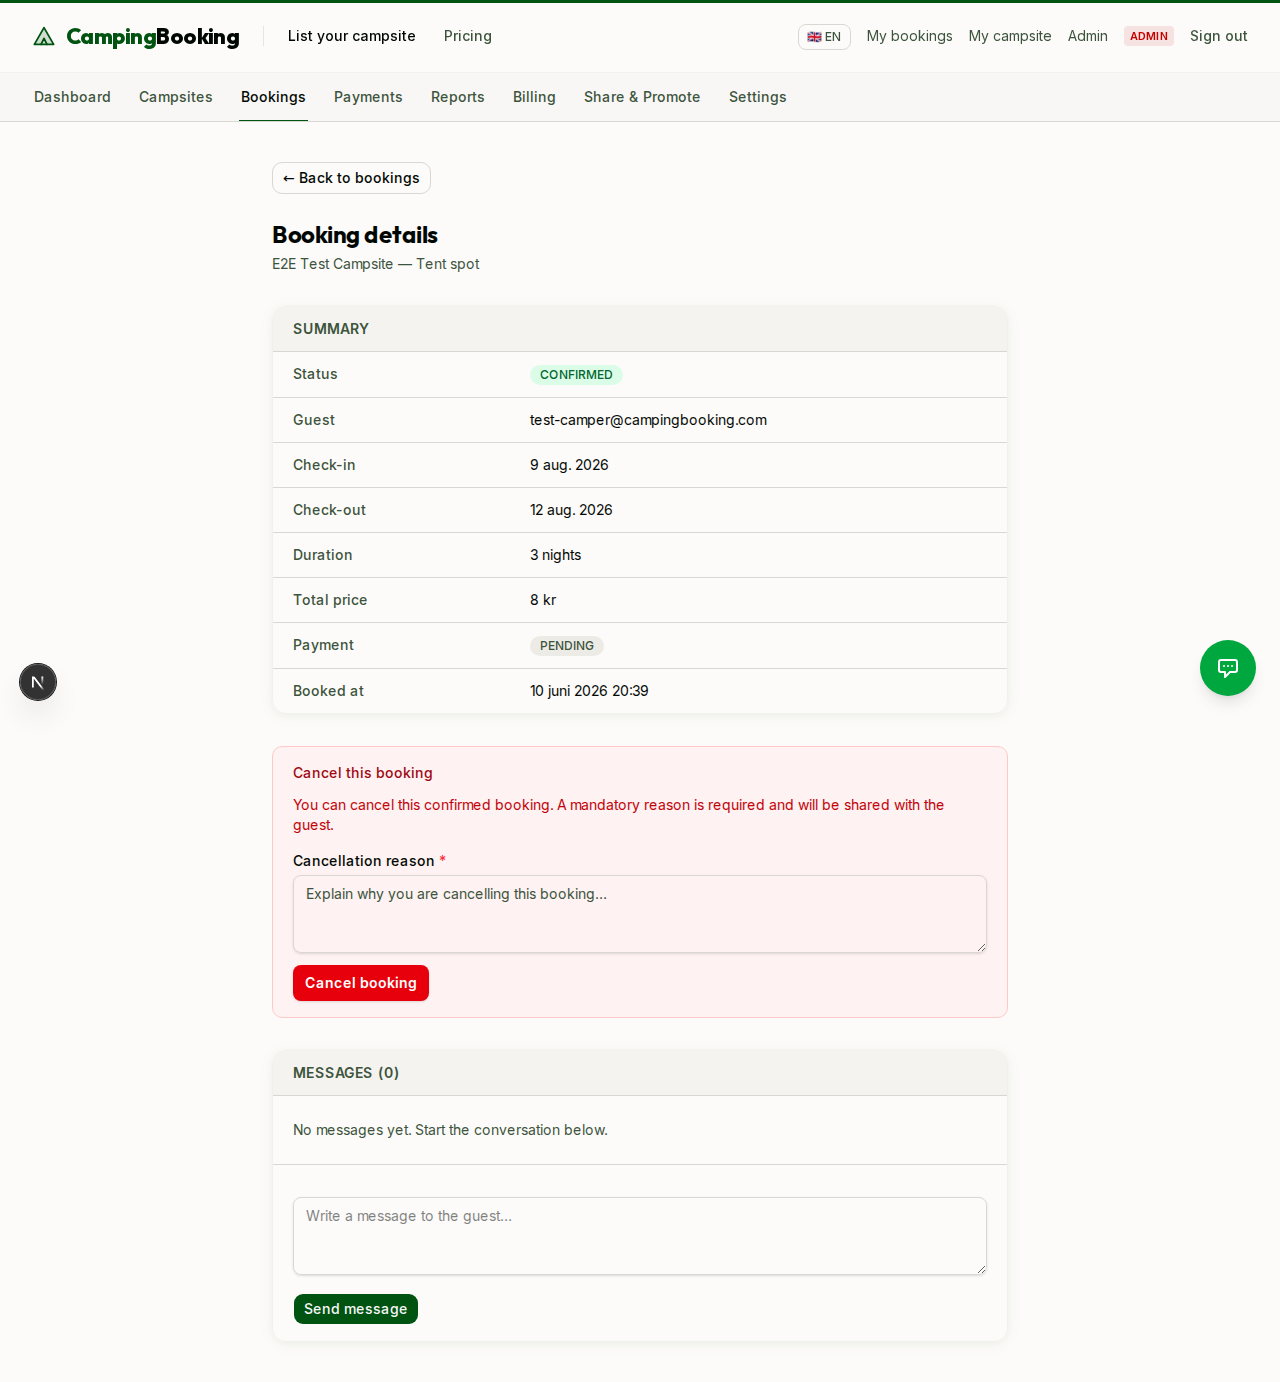
Use the message form on the booking detail page to communicate with the camper — for example, to share check-in instructions or ask a question before approving.
Step 4: Cancel a booking
If you need to cancel a confirmed booking (for example, due to unforeseen circumstances), open the booking and use the Cancel booking option. Provide a reason — this is shared with the camper and recorded for support purposes.
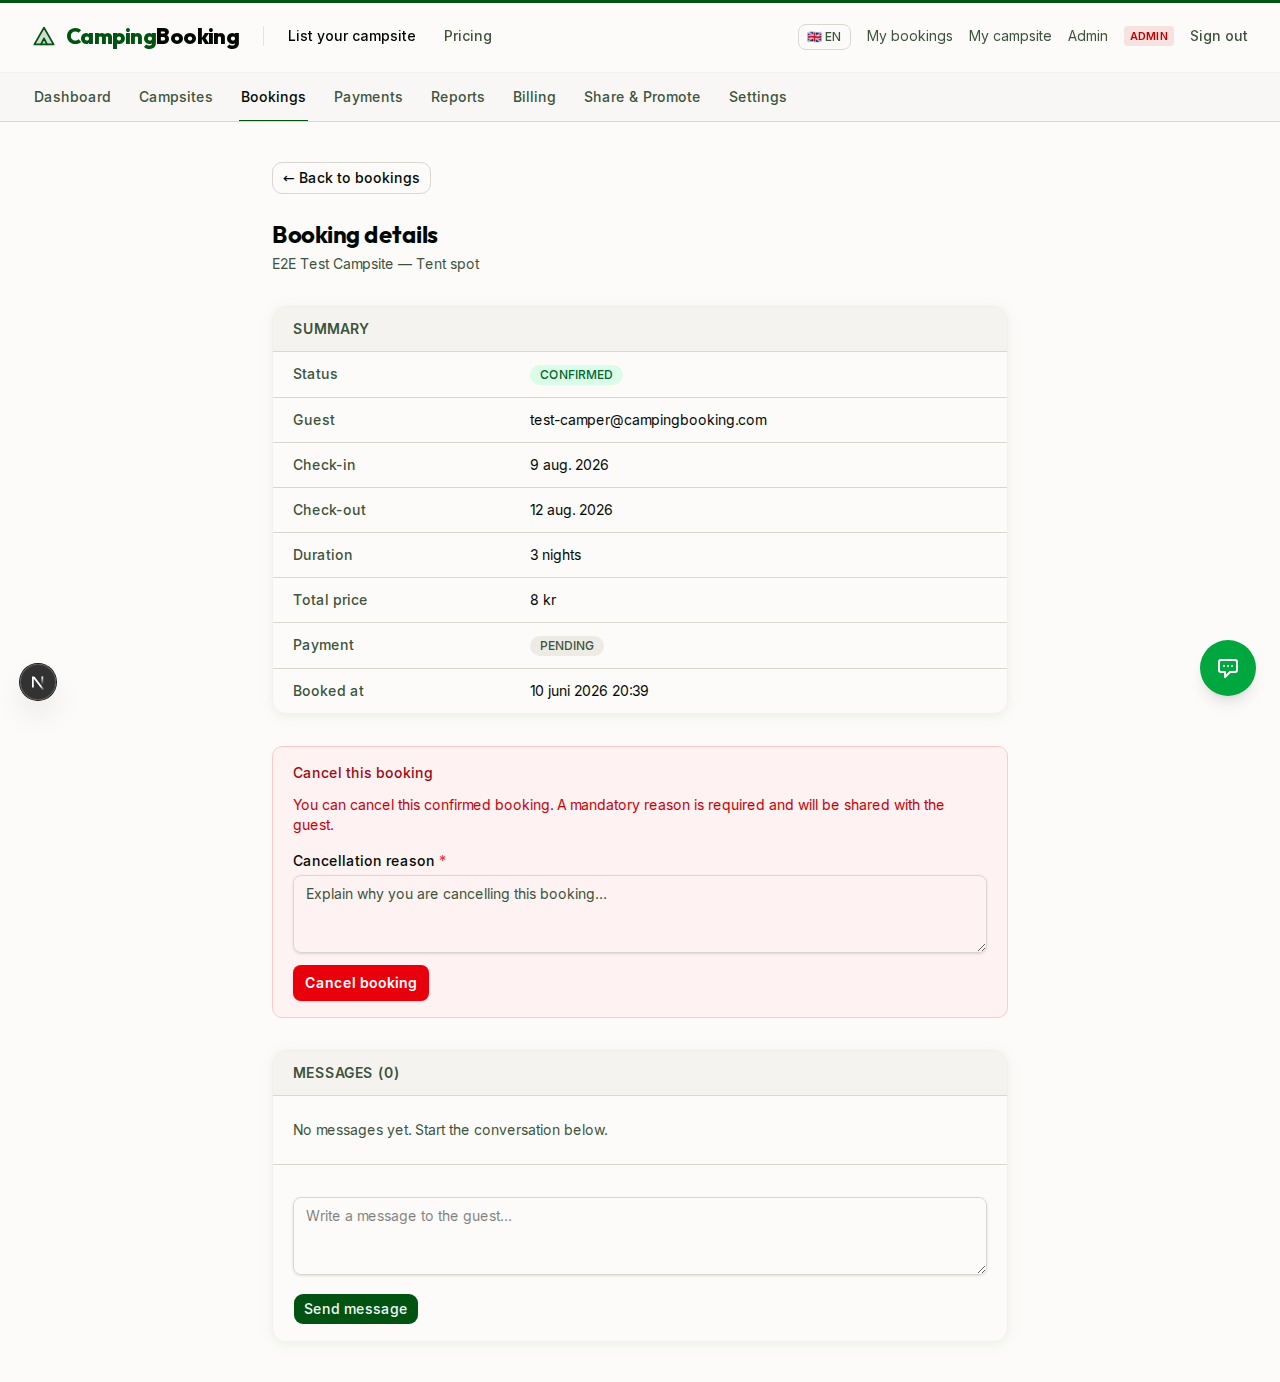
Tip: Cancelling a booking frees up the affected dates in your availability calendar, but cancellations should be rare — frequent cancellations affect your campsite's reputation with campers.
Next: Payouts via Stripe